
Air Bubbles in HPLC Solvent Lines: Symptoms, Detection, and Fixes
January 14, 2026
System type: Liquid Chromatography (LC)
Mobile Phase & Solvent Delivery
Complete Troubleshooting, Detection, and Prevention Guide
Primary keywords: air bubbles in HPLC, HPLC solvent lines, HPLC degassing, pressure fluctuations HPLC, baseline noise HPLC, negative peaks HPLC, pump cavitation
Secondary keywords: HPLC troubleshooting, mobile phase degassing, check valve issues HPLC, low-pressure leaks HPLC, retention time variability
Overview: Why Air Bubbles Are a Critical HPLC Problem
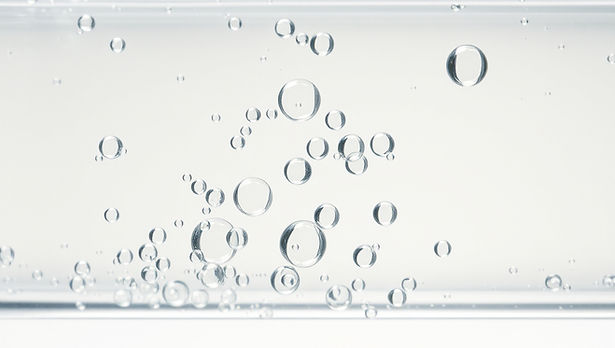
Air entrainment in the HPLC solvent path is one of the most common and disruptive causes of unstable flow, baseline noise or drift, negative spikes, and poor retention time reproducibility. Even small microbubbles can compress and expand under pressure, creating flow pulsation, detector artifacts, and chromatographic variability that compromise data quality.
Air can enter the system through inadequate degassing, suction-side leaks, pump or check-valve malfunction, or improper solvent handling. Because these issues often present similarly, a structured, bench-ready diagnostic approach is essential for rapid isolation and correction.
Common Symptoms of Air in HPLC Solvent Lines
Baseline and Detector Artifacts
Random baseline noise or spiking, often synchronized with pump strokes
Negative peaks or dips in isocratic runs or during gradients, caused by transient loss of detector signal when bubbles pass through the flow cell
Baseline steps or excursions during gradient changes due to outgassing from solvent composition shifts
Flow and Pressure Instability
Excessive pressure ripple beyond normal pump pulsation
Periodic pressure drops with each pump stroke
Gradual pressure decay after solvent change
Pump fails to prime or reach target pressure promptly
Chromatographic Performance Issues
Retention time drift and poor reproducibility
Elevated peak area %RSD in replicate injections
Peak splitting, tailing, or distortion when flow oscillation is significant
Audible and Visual Indicators
Visible bubbles in inlet tubing, degasser outlet lines, or purge tubing
Cavitation or clicking sounds in pump heads
Intermittent surging at the purge valve
Primary Root Causes of Air Entrapment in HPLC
1. Inadequate Mobile Phase Degassing
Vacuum degasser disabled or malfunctioning
Dissolved gases released during temperature changes or gradient composition shifts (e.g., high acetonitrile to aqueous conditions)
Insufficient degassing time after solvent replacement
2. Air Ingress on the Low-Pressure (Suction) Side
Loose fittings, damaged ferrules, or cracked tubing
Solvent reservoirs running low, causing vortexing
Partially blocked inlet frits or sinkers increasing suction and cavitation
3. Pump and Check-Valve Problems
Sticking or contaminated inlet/outlet check valves
Airlock formation after solvent changes
Worn pump seals drawing air during the suction stroke
4. Mixing and Gradient-Related Effects
Low-pressure proportioning systems drawing long slugs from low-percentage channels
Aggressive gradients with inadequate mixer volume
Rapid composition ramps promoting outgassing
5. Solvent and Tubing Factors
Highly gas-permeable tubing on the suction side
Excessively fine inlet filters increasing restriction
Poor solvent preparation, unfiltered or non-degassed mixtures
Large temperature differences between reservoir and instrument
Rapid Detection and Diagnostic Tests
Visual Inspection
Confirm sufficient solvent volume in all reservoirs
Ensure sinker filters are fully submerged and not vortexing
Inspect tubing from bottle → degasser → pump → purge line for visible bubbles
Purge and Prime Test
Open purge valve and prime each channel individually at high flow to waste
Observe for a smooth, continuous stream without sputtering
Gently tap pump heads to release trapped microbubbles
Pressure Restrictor Test
Remove the column and install a suitable backpressure restrictor
Stable pressure indicates proper priming
Periodic pressure dips indicate residual air or check-valve issues
Flow Accuracy and Precision Check
Collect timed flow gravimetrically or volumetrically
Flow %RSD greater than ~0.5–1.0% suggests air or pulsation
Suction-Side Leak Assessment
Remake all fittings from reservoir to pump
Replace hardened ferrules or cracked tubing
Verify bottle caps are properly vented
Degasser Function Check
Confirm degasser is enabled and allowed to equilibrate
Persistent bubbles downstream of the degasser suggest reduced efficiency
Check-Valve Evaluation
Continued pulsation after thorough priming points to sticking valves
Cleaning or replacement is often required
Gradient Blank Test
Run matched solvent gradients monitored by the detector
Negative spikes or composition-synchronous noise indicate outgassing or mixing-related bubble formation
Immediate Fixes: Step-by-Step Corrective Actions
Refill and Reposition Solvent Reservoirs
Top up reservoirs and maintain adequate head height
Position sinkers above the bottle bottom to avoid sediment and vortexing
Use anti-vortex adapters when operating at higher flow rates
Properly Degas the Mobile Phase
Activate the in-line vacuum degasser and allow sufficient equilibration time
If no degasser is available, gently sparge with helium or degas offline
Avoid excessive sparging with volatile modifiers
Thoroughly Prime Each Solvent Line
Prime each channel individually at high flow with the purge valve open
Vent trapped air briefly at the pump outlet if needed
Tap pump heads and check valves during priming to dislodge bubbles
Correct Suction-Side Restrictions
Replace clogged or overly fine inlet frits
Shorten or widen restrictive suction tubing where appropriate
Ensure solvent bottle caps are vented with solvent-compatible filters
Service Pump Components
Clean or replace inlet and outlet check valves if pulsation persists
Inspect pump seals for wear or leakage and replace as required
Optimize Instrument Settings
Verify compressibility compensation matches the mobile phase
Adjust draw profiles or mixer volume on low-pressure mixing systems to reduce microbubble formation
Instrument-Specific Considerations
Low-Pressure Mixing Systems
Prime each solvent channel separately
Inspect proportioning valves and manifolds for leaks
Avoid extreme low-percentage draws without adequate mixing volume
High-Pressure Mixing Systems
Prime each pump head independently
Ensure inlet valves respond correctly
Purge pulse dampers or bladders thoroughly
Autosampler and Wash Circuits
Prime wash and needle lines
Trapped air in autosampler plumbing can cause injection-related spikes
Prevention and Best Practices
Degassing Discipline
Keep the degasser powered whenever the system is operating
Maintain degasser components per manufacturer recommendations
For difficult gradients, ensure enhanced degassing
Proper Solvent Handling
Filter and degas all mobile phases before use
Allow solvents to reach laboratory temperature prior to installation
Avoid abrupt composition changes at startup
Hardware and Tubing Choices
Use low-permeability tubing on suction lines
Avoid unnecessary restrictions and overly fine inlet filters
Maintain pump seals and check valves proactively
Temperature Stability
Maintain stable laboratory and reservoir temperatures
Allow sufficient equilibration when using column ovens or bottle warmers
Verification After Troubleshooting
Run isocratic and gradient blanks to confirm a quiet baseline
Verify stable backpressure with minimal ripple
Confirm flow rate accuracy and acceptable %RSD
Perform system suitability to ensure retention time and area reproducibility meet method requirements
Safety Considerations
Direct purge waste to appropriate, grounded containers
Many mobile phases are flammable; handle with care
Wear appropriate PPE when handling solvents and fittings
Summary: Key Takeaways
Air bubbles in HPLC solvent lines commonly manifest as baseline noise, negative peaks, pressure pulsation, and retention variability. The majority of cases stem from inadequate degassing, suction-side leaks or restrictions, and pump or check-valve issues. A systematic approach—visual inspection, thorough priming, degasser verification, and component maintenance—resolves most problems quickly and restores chromatographic stability.
Recommended Next Steps
Begin with a full prime of each solvent channel to waste with the degasser enabled, confirming visually that no bubbles remain. If instability persists, inspect inlet frits and remake all suction-side fittings. Proceed to clean or replace check valves and evaluate pump seals. Conclude with a gradient blank test to confirm baseline stability before resuming analytical work.
Relevant Articles
ChemITrust AI & Lab Services